DIY Egg Yolk + Honey Nourishing Mask
I’ve been researching natural skincare for quite some time, and one of my favorite discoveries has been the DIY egg yolk + honey nourishing mask. In my experience with this DIY egg yolk + honey nourishing mask, I’ve found that it not only nourishes my skin but also gives it a beautiful glow. I want to share what I’ve learned about this amazing mask and how it can transform your skincare routine.
Using the DIY egg yolk + honey nourishing mask has become a regular part of my skincare regime. I’ve noticed that my skin feels softer and looks more radiant after each use. The combination of egg yolk and honey is a powerhouse for hydration and nourishment, and I believe everyone should give it a try!
Why I Love the DIY Egg Yolk + Honey Nourishing Mask
The Benefits of Natural Ingredients
I’ve discovered that using natural ingredients in my skincare provides not only effective results but also peace of mind. The DIY egg yolk + honey nourishing mask is a perfect example of this. Egg yolk is rich in vitamins A, D, and E, which help to nourish and repair the skin. Honey, on the other hand, is a natural humectant, meaning it draws moisture into the skin, leaving it hydrated and plump.
From my research, I’ve learned that many store-bought masks contain harsh chemicals that can irritate the skin. By opting for a DIY approach, I can ensure that I am using gentle, nourishing ingredients that my skin craves. This mask is not only safe but also incredibly effective.
My Personal Experience
In my experience, the DIY egg yolk + honey nourishing mask has worked wonders for my skin. After applying it regularly for a few weeks, I noticed a significant improvement in my skin’s texture and appearance. It felt smoother, and my complexion appeared brighter.
I recommend this mask especially for those with dry or dull skin. The hydrating properties of honey combined with the vitamins in egg yolk can truly revitalize tired skin and give it a fresh, youthful glow. It’s like a spa treatment right at home!
Ingredients and Their Benefits
Egg Yolk
Egg yolk is a fantastic ingredient that I’ve come to appreciate in my skincare. Not only does it provide essential fatty acids, but it also helps in collagen production, which is crucial for firm and youthful skin. I’ve seen the difference in my skin’s elasticity since incorporating it into my routine.
Moreover, I’ve found that egg yolk can help reduce the appearance of pores, making my skin look smoother and more refined. This is something I always look for in a nourishing mask, and the DIY egg yolk + honey nourishing mask delivers just that.
Honey
Honey is another ingredient that I absolutely adore. It has antimicrobial properties, which means it can help combat acne while also providing moisture. I’ve used honey in various DIY recipes, but its role in this mask is particularly special. It works to soothe irritated skin and accelerate healing.
What I love most is how honey makes my skin feel. After using the DIY egg yolk + honey nourishing mask, my skin feels soft and supple, almost as if I’ve applied a luxurious moisturizer. It’s simply divine!
How to Make the DIY Egg Yolk + Honey Nourishing Mask
Simple Ingredients
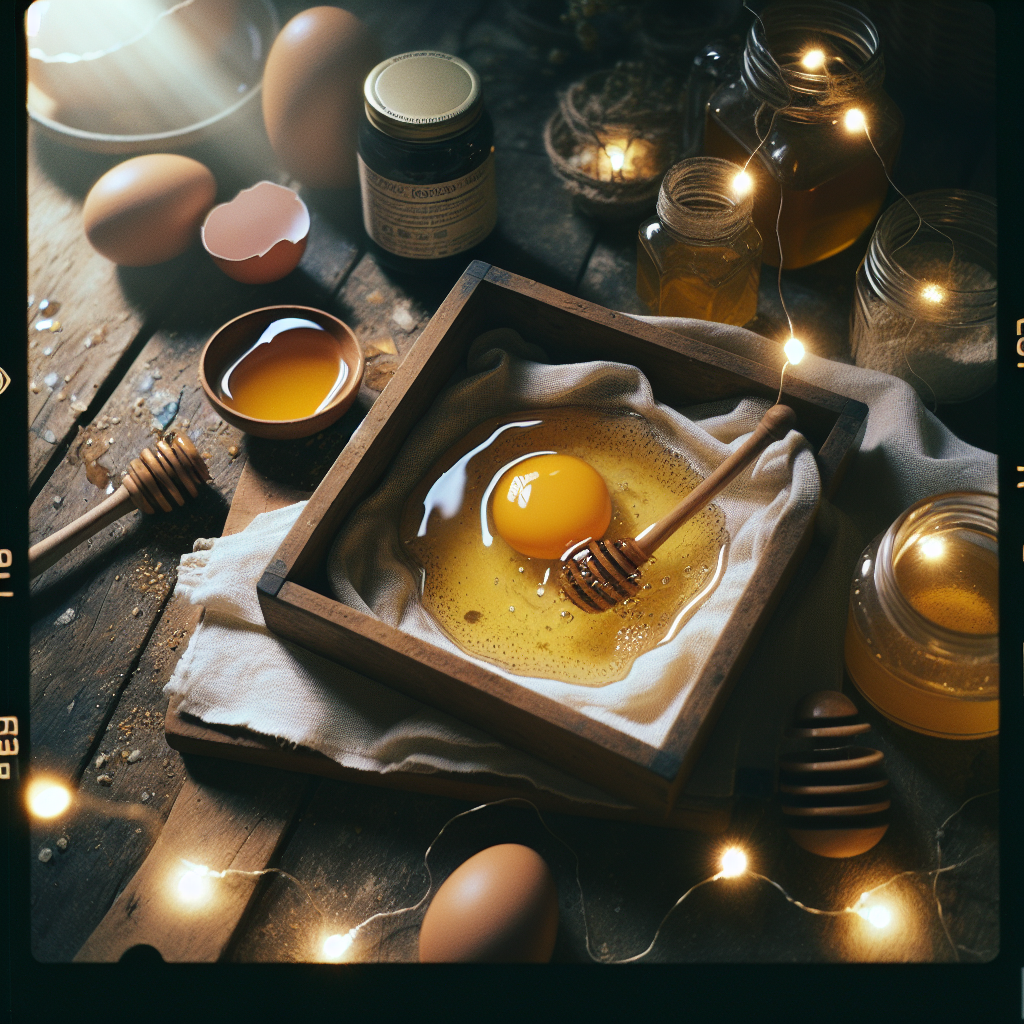
Making the DIY egg yolk + honey nourishing mask is incredibly easy and only requires two main ingredients: one egg yolk and one tablespoon of honey. I’ve found that using organic eggs and raw honey can enhance the benefits, but regular ingredients work just fine!
Simply separate the yolk from the egg white and mix it with the honey until you achieve a smooth consistency. I love how quick and straightforward this process is, making it easy to whip up whenever I feel like pampering my skin.
Mixing and Storage Tips
From my experience, the key to a great mask is how well you mix it. I recommend using a whisk or a fork to ensure the egg yolk and honey blend seamlessly. If you find the mixture too thick, you can add a few drops of water to reach your desired consistency.
Additionally, if you have leftover mask, I suggest storing it in an airtight container in the fridge for up to two days. However, I recommend using the DIY egg yolk + honey nourishing mask fresh for the best results!
My Application Tips for the Best Results
Preparing Your Skin
Before applying the DIY egg yolk + honey nourishing mask, I always ensure my face is clean and free from makeup. I like to wash my face with a gentle cleanser and pat it dry. This step is crucial because it allows the mask to penetrate deeper into the skin.
I’ve found that steaming my face for a few minutes beforehand can also enhance the mask’s effectiveness. The steam opens up my pores, allowing the nourishing ingredients to work their magic more efficiently.
Application Technique
When it comes to applying the DIY egg yolk + honey nourishing mask, I prefer using a brush or my fingers. I apply an even layer all over my face, avoiding the eye area. I love to take my time during this process—massaging the mask into my skin helps to boost circulation.
After applying, I usually let the mask sit for about 15-20 minutes. I recommend using this time to relax, perhaps with some calming music or a good book. Trust me, it’s a delightful way to treat yourself!
References and Resources
Throughout my research on DIY egg yolk + honey nourishing mask, I’ve found these resources incredibly valuable. I recommend checking them out for additional insights:
Authoritative Sources on DIY egg yolk + honey nourishing mask
-
Natural Honey: A Comprehensive Review
ncbi.nlm.nih.govThis review covers the numerous benefits of honey, including its skincare properties, making it a must-read for anyone interested in DIY masks.
-
Egg Yolk – Nutritional and Cosmetic Benefits
ncbi.nlm.nih.govAn insightful article discussing the benefits of egg yolk in diets and its topical applications in skincare.
-
Honey for Skin: Benefits and Uses
healthline.comAn overview of honey’s benefits for skin, including its moisturizing and healing properties.
-
Egg Yolk and Skin Health
ncbi.nlm.nih.govA study on the effects of egg yolk on skin health, demonstrating its rich nutrient profile.
-
Natural Antioxidants in Skincare
sciencedirect.comAn exploration of natural antioxidants in skincare, including those found in eggs and honey.
-
Nutritional Benefits of Egg Yolk
unicef.orgA detailed report on the nutritional benefits of egg yolk, highlighting its role in health and beauty.
-
What Are the Benefits of Honey?
medicalnewstoday.comAn informative article discussing the various benefits of honey, including its effects on skin health.
-
Skin Benefits of Natural Ingredients
ncbi.nlm.nih.govA comprehensive look at the benefits of natural ingredients in skincare, perfect for DIY enthusiasts.
Frequently Asked Questions
What is a DIY egg yolk + honey nourishing mask?
In my experience, a DIY egg yolk + honey nourishing mask is a natural skincare treatment that combines the nourishing properties of egg yolk and honey. This mask hydrates, brightens, and revitalizes the skin, making it a simple yet effective addition to any skincare routine.
How often can I use the DIY egg yolk + honey nourishing mask?
I’ve found that using the DIY egg yolk + honey nourishing mask once or twice a week works best for me. This frequency allows my skin to benefit from the nutrients without overwhelming it. Always listen to your skin and adjust accordingly.
Can I store the DIY egg yolk + honey nourishing mask?
Yes, you can store the DIY egg yolk + honey nourishing mask in an airtight container in the fridge for up to two days. However, I recommend using it fresh for the best results, as the nutrients are most potent right after preparation.
What skin types benefit from the DIY egg yolk + honey nourishing mask?
From what I’ve learned, the DIY egg yolk + honey nourishing mask is suitable for all skin types, but it’s especially beneficial for dry and dull skin. The hydrating properties of honey and the nourishing vitamins in egg yolk can help rejuvenate and brighten the complexion.
Conclusion
In conclusion, my research on the DIY egg yolk + honey nourishing mask has shown me just how effective and beneficial natural ingredients can be in skincare. I hope this guide helps you explore the wonders of this mask and inspires you to incorporate it into your routine. Based on my experience, I can confidently say that you’ll love the results as much as I do!
Find out more information about “DIY egg yolk + honey nourishing mask”
Search for more resources and information: